Security Configuration
JHipster Security
To use Spring Security with a Single Web Page Application, like the ones generated by JHipster, you need Ajax login/logout/error views. We have configured Spring Security in order to use those views correctly, and of course we generate all the JavaScript and HTML code for you.
By default, JHipster comes with 4 different users:
“system”, who is mainly used by our audit logs, when something is done automatically
“anonymousUser”, who is given to anonymous users when they do an action
“user”, who is a normal user with “ROLE_USER” authorization. His default password is “user”
“admin”, who is an admin user with “ROLE_USER” and “ROLE_ADMIN” authorizations. His default password is “admin”
For security reasons, you should change those default passwords.
More info are provided here: https://jhipster.github.io/security/
Role Management
When adding a new ROLE, consider the following steps,
- Update role data in DB, In
src/main/resources/config/liquibasedirectory, add new role toauthorities.cs. - Update
AuthoritiesConstants.java, add new role constant, and the static method if you need. - Change the corresponding security control and your logic.
Java Security Configuration
Project level
In
SecurityConfiguration.java, define WebSecurity (e.g., specify which api is an exemption) and HttpSecuritypublic void configure(WebSecurity web) throws Exception {
web.ignoring()
.antMatchers("/swagger-ui/index.html")
.antMatchers("/api/register")
.antMatchers("/api/activate");
}In
OAuth2ServerConfiguration.java, prevent an API from OAuth2 authentication.
Object level
Allow a particular role to access an API.
("/api")
(AuthoritiesConstants.USER)
public class IpsUserProfileResource {...}Method level
Check whether or not the current login user has a particular role.if (!SecurityUtils.isUserInRole(AuthoritiesConstants.ADMIN)) {
//...
}
Angular Security Configuration
Some recommendation here (need explore more and the differences…)
<div has-role="ROLE_ADMIN"> </div>
<div has-authority="ROLE_ADMIN"> </div>
More Features
OAuth2 Authentication
OAuth2 is a stateless security mechanism, so you might prefer it if you want to scale your application across several machines. Spring Security provides an OAuth2 implementation, which we have configured for you.
The biggest issue with OAuth2 is that requires to have several database tables in order to store its security tokens. If you are using an SQL database, we provide the necessary Liquibase changlog so that those tables are automatically created for you.JWT authentication
JSON Web Token (JWT) authentication, like OAuth2, is a stateless security mechanism, so it’s another good option if you want to scale on several different servers.
This authentication mechanism doesn’t exist by default with Spring Security, it’s a JHipster-specific integration of the Java JWT project. It is easier to use and implement than OAuth2, as it does not require a persistence mechanism, so it works on all SQL and NoSQL options.
This solution uses a secure token that holds the user’s login name and authorities. As the token is signed, it cannot be altered by a user.
The secret key should be configured in the application.yml file, as the jhipster.security.authentication.jwt.secret property.HTTP Session Authentication
This is the “classical” Spring Security authentication mechanism, but we have improved it quite significantly. It uses the HTTP Session, so it is a stateful mechanism: if you plan to scale your application on multiple servers, you need to have a load balancer with sticky sessions so that each user stays on the same server.
- Improved remember-me mechanism
We have modified the Spring Security remember-me mechanism so that you have a unique token, that is stored in your database (SQL or NoSQL database, depending on your choice during generation!). We also store more information than the standard implementation, so you have a better understanding of where those tokens come from: IP address, browser, date… And we generate a complete administration screen, so that you can invalidate sessions, for example if you forgot to log out on another computer. - Cookie theft protection
We have added a very complete cookie theft protection mechanism: we store your security information in a cookie, as well as in the database, and each time a user logs in we modify those values and check if they have been altered. That way, if a user ever steals your cookie, he will be able to use only once, at most. - CSRF protection
Spring Security and AngularJS both have CSRF protection out-of-the-box, but unfortunately they don’t use the same cookies or HTTP headers! In practice, you have in fact no protection at all for CSRF attacks. Of course, we re-configure both tools so that they correctly work together.
JHipster provide “social login”, using Spring Social, so users can connect to your application using their Google, Facebook or Twitter authentication. This is configured using Sping Boot’s starter modules.
DB Management
Update DB Manually
Database updates by manually editing the change log
If you prefer (or need) to do a database update manually, here is the development workflow:
- Modify your JPA entity (add a field, a relationship, etc.)
Create a new
change login yoursrc/main/resources/config/liquibase/changelogdirectory. The files in that directory are prefixed by their creation date (inyyyyMMddHHmmssformat), and then have a title describing what they do. For example,20141006152300_added_price_to_product.xmlis a good name.<?xml version="1.0" encoding="UTF-8"?>
<databaseChangeLog xmlns="http://www.liquibase.org/xml/ns/dbchangelog"
xmlns:ext="http://www.liquibase.org/xml/ns/dbchangelog-ext"
xmlns:xsi="http://www.w3.org/2001/XMLSchema-instance"
xsi:schemaLocation="http://www.liquibase.org/xml/ns/dbchangelog-ext http://www.liquibase.org/xml/ns/dbchangelog/dbchangelog-ext.xsd http://www.liquibase.org/xml/ns/dbchangelog http://www.liquibase.org/xml/ns/dbchangelog/dbchangelog-3.5.xsd">
<changeSet author="volcanohong (generated)" id="1481426741244-1">
<addColumn tableName="loyalty_scheme">
<column name="created_date" type="timestamp"/>
</addColumn>
</changeSet>
<changeSet author="volcanohong (generated)" id="1481426741244-2">
<addColumn tableName="loyalty_scheme">
<column name="last_modified_date" type="timestamp"/>
</addColumn>
</changeSet>
</databaseChangeLog>Add this “change log” file in your
src/main/resources/config/liquibase/master.xmlfile, so it is applied the next time you run your application
More information for using Liquibase.
Note that in pom.xml, liquibase plugin configuration needs to be updated accordingly.
<plugin> |
And there is no need to change any existing xml files except master.xml. Otherwise, a liquibase checksum validation error will raise.
Load Data to DB
- Create a
.csvfile with data insrc/main/resources/config/liquibasedirectory. Create a
change loginsrc/main/resources/config/liquibase/changelogdirectory. For example, axmlfile with name20161140000001_load_data_UserDevice.xml, which specify the changelog id, data file, separator and table name.<?xml version="1.0" encoding="utf-8"?>
<databaseChangeLog
xmlns="http://www.liquibase.org/xml/ns/dbchangelog"
xmlns:xsi="http://www.w3.org/2001/XMLSchema-instance"
xsi:schemaLocation="http://www.liquibase.org/xml/ns/dbchangelog http://www.liquibase.org/xml/ns/dbchangelog/dbchangelog-3.4.xsd">
<!--
Loaded data for UserDevice.
-->
<changeSet id="20161110000001-3" author="jhipster">
<loadData encoding="UTF-8"
file="config/liquibase/user_device.csv"
separator=","
tableName="user_device"/>
</changeSet>
</databaseChangeLog>Update
master.xmlfile with the changelog of loading data.<databaseChangeLog>
...
<include file="classpath:config/liquibase/changelog/20161140000001_load_data_UserDevice.xml" relativeToChangelogFile="false"/>
...
</databaseChangeLog>run
./mvnw cleanto clean the DB.
Update Default Data
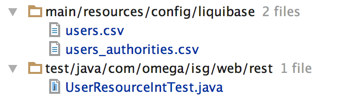
Here takingUSERandUSER_AUTHORITYtable for example.
In file
users.csv, update all default user data
The password should be encrypted.import org.springframework.security.crypto.password.PasswordEncoder;
private PasswordEncoder passwordEncoder;
String encryptedPassword = passwordEncoder.encode(password);In file
users_authorities.csv, update user authorities bridge table.Run maven test to make sure all tests can pass. For example, if the admin user is changed, one of the test in
UserResourceIntTest.javamight be failed.